
Serial streamer example: Arduino UNO as sensor
This document will walk you through how to connect an Arduino UNO to provide sensor data to sa.engine.
Hardware:
Prerequisite: You should have basic knowledge of the Arduino IDE. More information can be found here
In the following examples we will use the serial streamer interface. For more information about the serial streamer interface Serial streamer
Arduino UNO as signal generator
In the first example we are going to use the Arduino Uno board as a simple signal generator.
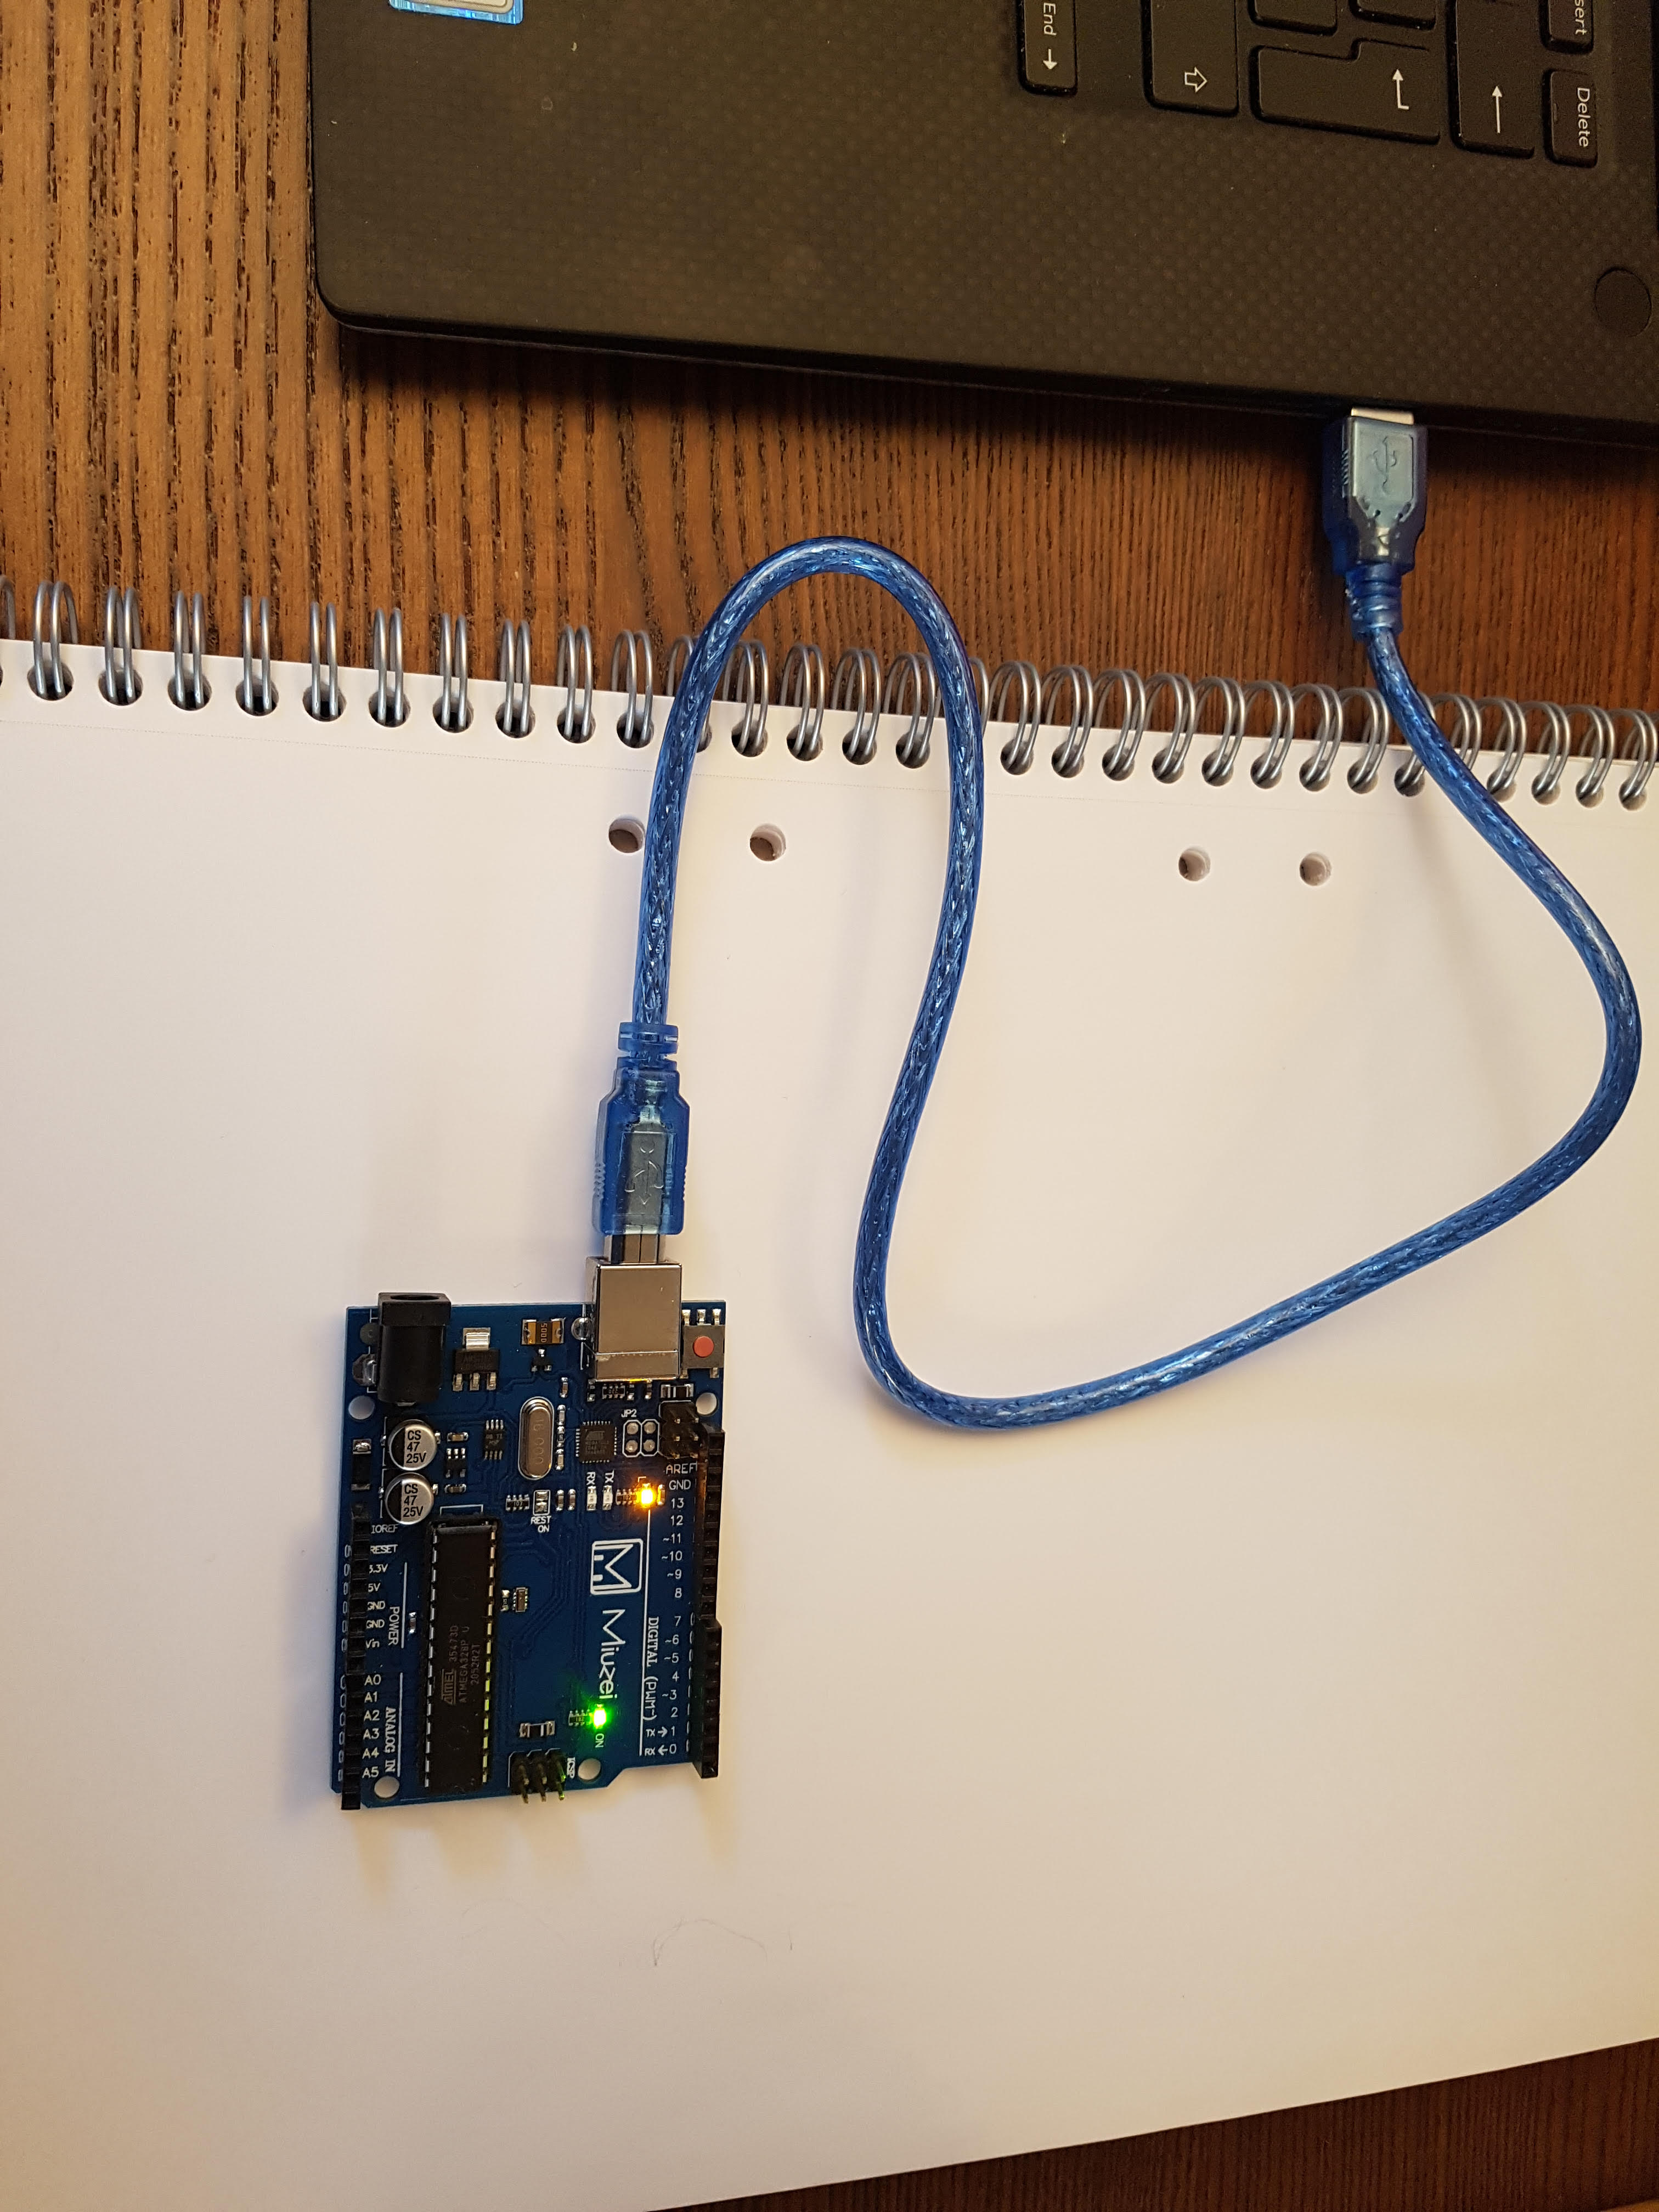
Connect the Arduino Uno board to your computer
Create a new sketch in the Arduino IDE. Copy and paste the following code to the sketch and upload it to the Uno board.
const float pi=3.14159;

void setup() {
  Serial.begin(115200); // open the serial port at 115200 bps:
}

void loop() {
  static uint8_t pkt[8];

  static int i=0;
  static int x = 0;
  static float y = 0;
  static uint8_t square = 60;
  static uint8_t height = -1;

  y=20*sin(x*pi/180);   //calculate sine, transform deg->rad

  pkt[0] = 0x55; //Startbyte
  pkt[1] = 0x00; // Not in use
  pkt[2] = 0x00; // Not in use
  pkt[3] = square+height*20; //square wave
  pkt[4] = 97+i; //sawtooth wave
  *((int16_t *)&pkt[5]) = (int16_t)(y); //Sine wave
  pkt[7] = 0xAA; //Stopbyte


  i++;
  if(i>20)
  {
    i=0;
    height *=-1;
  }
  x=x+5;// increase the angle
  Serial.write(pkt,8);  // send package
  delay(10);
}
We will use unpack to extract the integers from the binary data:
mddoc("unpack")
To run this code block you must be logged in and your studio instance must be started.
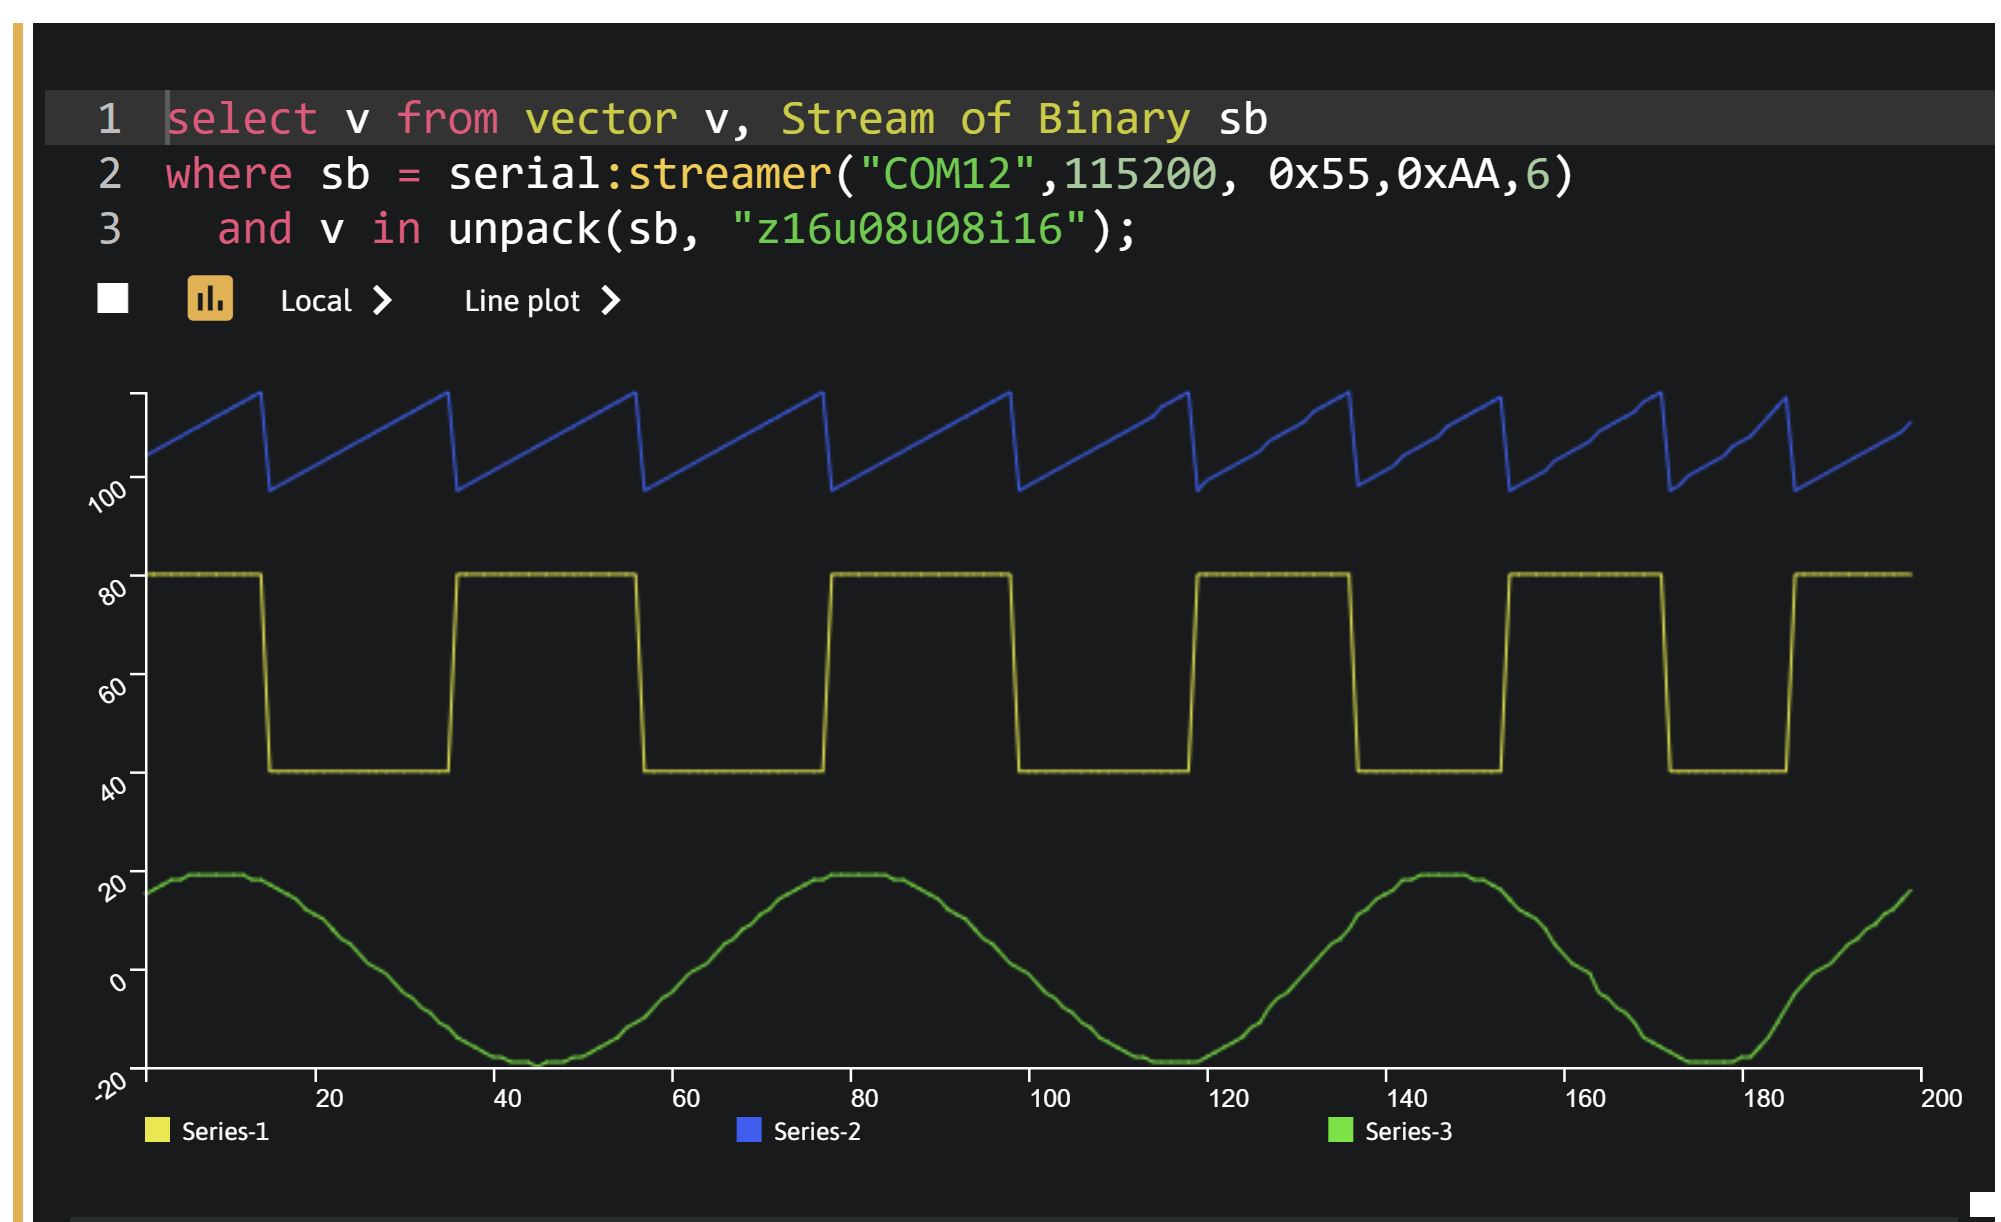
Run the query
select v from vector v, Stream of Binary sb
where sb = serial:streamer("COM12",115200, 0x55,0xAA,6)
  and v in unpack(sb, "z16u08u08i16");
To run this code block you must be logged in and your studio instance must be started.
Update the query so it use the correct COM-port (the example use COM12)
If everything is connected correctly, the following should be displayed.
Modify the Arduino code so the two unused bytes are filled with data. Change the OSQL-query so unpack handles the first 2 bytes as well.
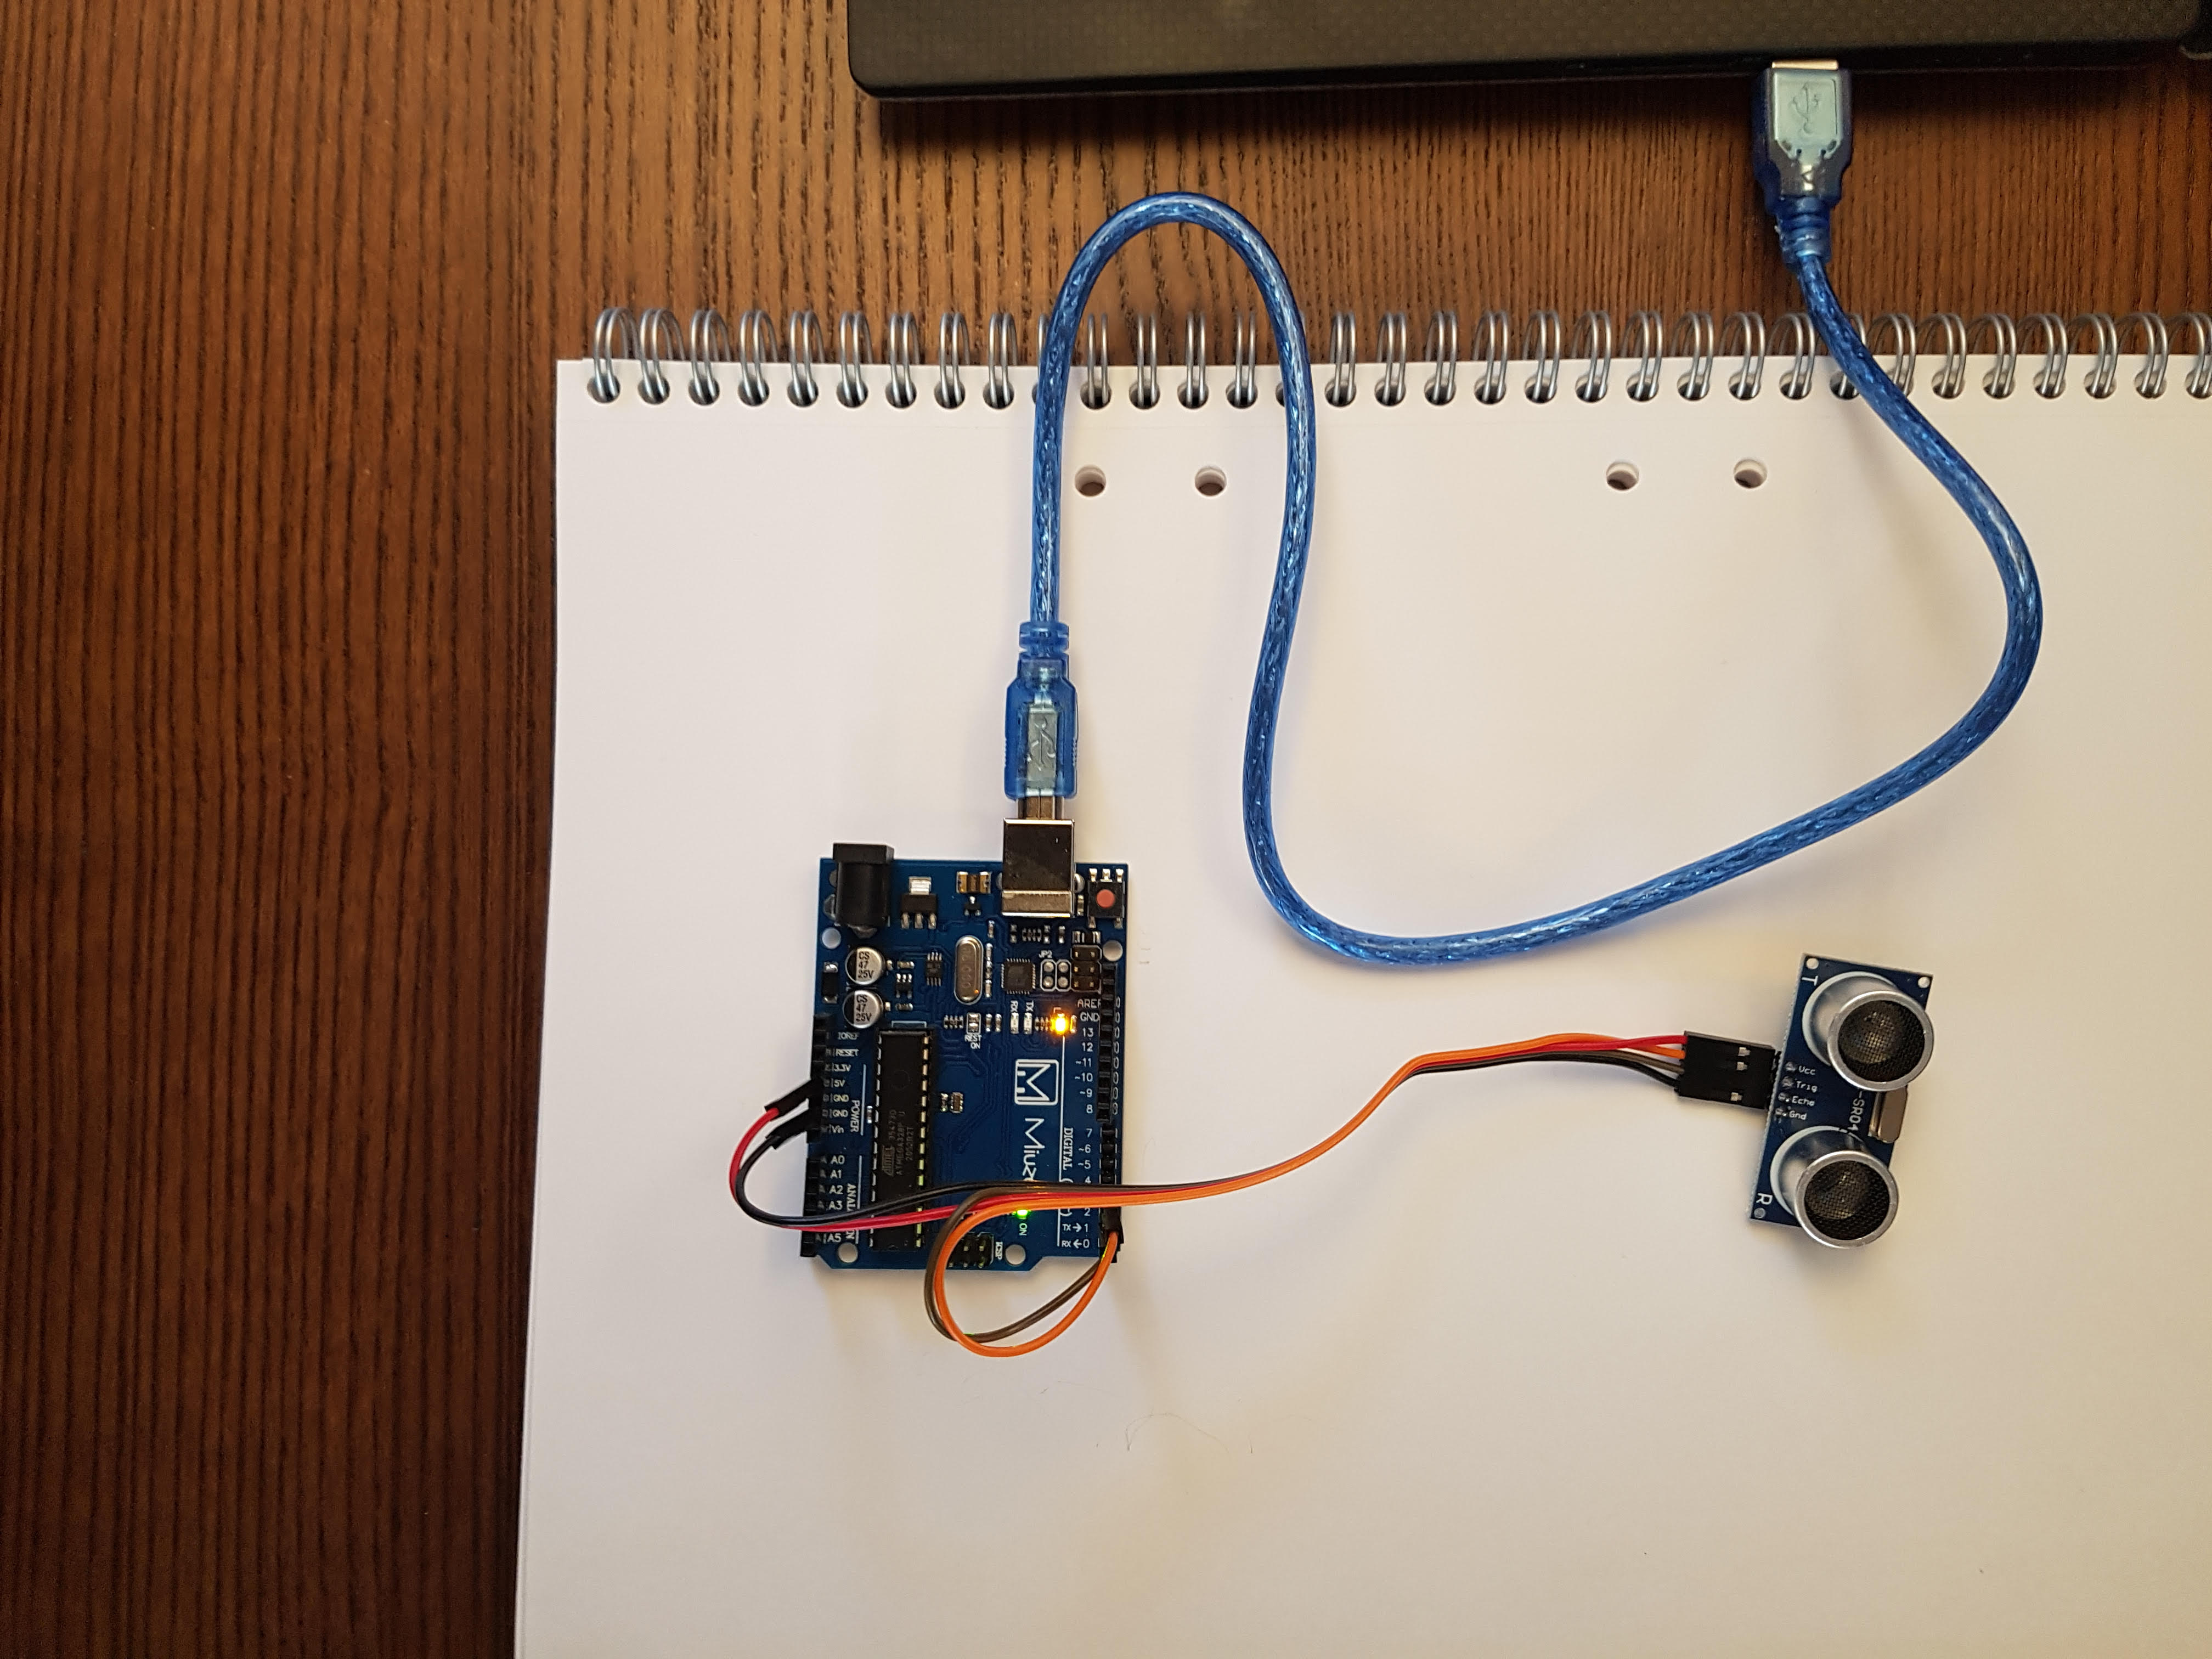
ARDUINO UNO board with connected sensor
In the second example we are going to use the Arduino ultrasonic sensor to provide sa.engine with sensor data.
Connect the Arduino distance sensor to the Arduino board.
Connect the four cables from the distance sensor to the Arduino Uno board as follows
- vcc to +5 volt
- gnd to gnd
- trig to digital 3
- echo to digital 2
Create a new sketch in the Arduino IDE. Copy and paste the following code to the sketch and upload it to the Uno board.
#define echoPin 2
#define triggerPin 3

long duration; // variable for the duration of sound wave travel
uint16_t  distance; // distance to target in cm

void setup() {
  pinMode(triggerPin, OUTPUT); // Sets the trigPin as an OUTPUT
  pinMode(echoPin, INPUT);
  Serial.begin(115200);
}

uint16_t distance_sensor()
{
  // Clears the trigPin condition
  digitalWrite(triggerPin, LOW);
  delayMicroseconds(2);
  // Sets the triggerPin HIGH (ACTIVE) for 10 microseconds
  digitalWrite(triggerPin, HIGH);
  delayMicroseconds(10);
  digitalWrite(triggerPin, LOW);
  // Reads the echoPin, returns the sound wave travel time in microseconds
  duration = pulseIn(echoPin, HIGH);
  // Calculating the distance
  distance = duration * 0.034 / 2; // Speed of sound wave divided by 2 (go and back)
  // Displays the distance on the Serial Monitor
  return distance;
}

void loop() {
  static uint8_t pkt[2];
   pkt[0] = 0x55; //Startbyte
 *((uint16_t *)&pkt[1]) = distance_sensor();
  pkt[3] = 0xAA; //stopbyte
  Serial.write(pkt,4);
  delay(10);
}
Run the query.
select v from vector v, Stream of Binary sb
where sb = serial:streamer("COM12",115200, 0x55,0xAA,2)
  and v in unpack(sb, "u16");
To run this code block you must be logged in and your studio instance must be started.
Note: Update the query so it use the correct COM-port (the example use COM12)
Place an object at different distances in front of the distance sensor and verify that streaming distance changes.